Encoding in AVIUtl
AVIUtl is my latest program discovery and thanks to Jackei we now have an English version of the program. A few filters that I'm going to use for the whole process are still in Japanese but it should be possible to get along with them.
In order to use AVIUtl with DVD2AVI as a frameserver - it is possible to use any frameserver, of course but DVD2AVI is the tool of my choice - you will have to put both DVD2AVI and it's VFP plugin in the same folder. Then rip your DVD with a ripper than supports IFO parsing. For simplicity I suggest SmartRipper for the operation.
>> Read more about
SMARTRIPPER
After ripping start up DVD2AVI and select File - Open.
Then press F5 which will launch the preview mode. DVD2AVI is a really
fast VOB player and besides it can show you the video structure, much
like FlaskMpeg's built-in player.
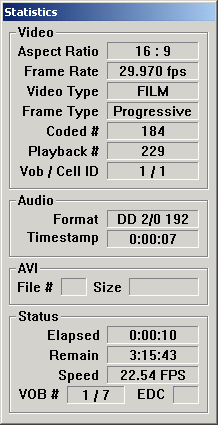

And before I forget: IVTC only applies to NTSC sources. If you're doing PAL forget that I even mentioned it.
Then set the audio options:

Then save your current project:
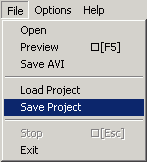
You'll end up with a .d2v and a .wav file.
The AVIUtl package that you can download from this site contains all the necessary software for this guide, as well as instructions on how to set up AVIUtl, as it's by default still in Japanese. Then you can simply load - Control O - the project file created by DVD2AVI (filename.d2v). Ignore all the options presented to you in the load dialog unless you're in a situation where IVTC is required or requested. In that case you'll have to verify that you get the right field order first.
>> Read more about
FINDING THE
RIGHT FIELD ORDER
 At
first you may want to resize the picture to the desired resolution. Please
refer to the bitrate and resolution
guide for more info about calculating resolutions. The resizing dialog
is in the settings menu. Simply enter the desired value in the field that
will follow.
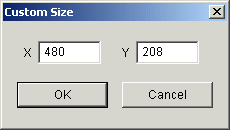
Right now the image will look squeezed in the main AVIUtl window.
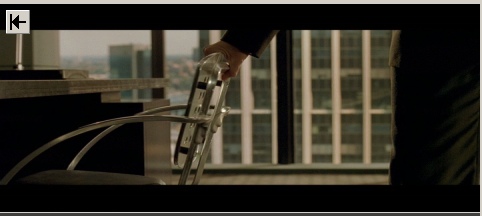
The default resizing algorithm used is bilinear resizing. For a better quality resizing you can use the Convolution bicubic resizer, which is unfortunately Japanese but easy to understand.
>> Read More about
BICUBIC
FILTERING
The next step is to crop the image. We'll simply get rid of all the black bars while staying at the set resolution.
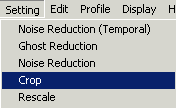 You'll
then see a small popup window where you can perform all the cropping whereas
in the main window you'll see the effect of your cropping.
 If
you check the small checkbox in the top left you'll immediately see the
effects of your cropping settings. Increase the Top slider until the picture
matches the upper border of the window:
Your movie should now look like this:
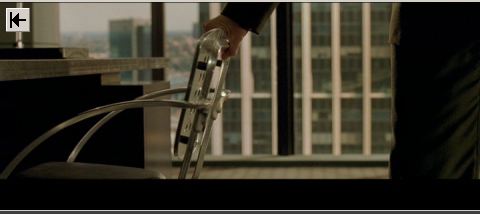
If you perform the same operation for the Bottom slider you should finally end up with something like this:
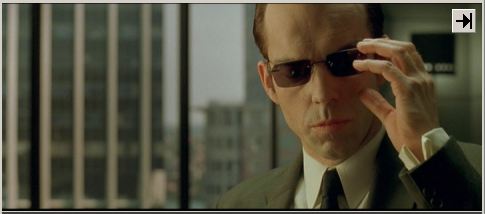
Now that this part has been done let's take a look at yet another nice filter which I put in the AVIUtl package: The scene change detection filter. This filter will detect scene changes and insert a keyframe at these locations. Keyframes at scene changes are a really good thing since now we can save our keyframes for the positions where they're really needed: at places where a large part of the image changes.
The Scene change detection filter can be found right above the color correction filter.
 I
don't pretend I understand most of the options but it appears that the
filter is working rather good at the default settings.
Using the back and next buttons enables you to navigate between scene changes. The key button makes the currently displayed frame (the one with the green border which is also being displayed in the main AVIUtl window) a keyframe. Next search searches for the next scene change. All set will scan the whole movie for scene changes and set every frame that marks a scene change as a keyframe.
The three small pictures represent the currently selected, the next and the previous frame and you can clearly see that at the moment we're at a scene change. The number of the currently selected frame is being displayed at the title bar of the plugin.
If somebody could translate the settings (how about recompiling ?) and
the readme it would be highly appreciated. All the sliders allow you to
configure the search algorithm and is being explained in the Japanese
readme.
And now before we start encoding one last issue: If in DVD2AVI you enabled
preserve Film you don't have to worry about the following paragraph. Now
let's look at how we're going to perform the IVTC, which according to
my tests works really well with Hollywood movies. Unfortunately the same
can't be told for Animes. They mark the sad culmination of encoding screwups
and so far there's no auto IVTC that's suitable for animes :( In any case
AVIUtl managed to properly IVTC 2 movies where TMPG failed big time: Rush
Hour and Austin Powers 1. It also worked on Friday, the 3rd title I threw
at it.
Here's how you enable the auto IVTC:
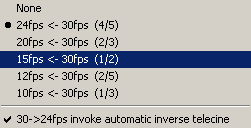 In
the Settings menu click on Framerate Conversion and check 30->24fps
invoke automatic inverse telecine and select 24 <- 30fps (4/5) framerate
change. Then you also have to enable the auto IVTC in the deinterlace
menu. Don't worry, that won't deinterlace anything.
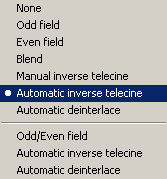 In
the Deinterlace menu which you'll also find in the Settings menu you select
Automatic inverse telecine. If you've set all this it should say "Automatic
inverse telecine" in the titlebar - along with lots of other things
of course.
If you encode at 29.97fps and want to deinterlace this is also the menu you're looking for although due to the good-working IVTC this is only a last resort solution if auto-IVTC should fail.
The nice thing about AVIUtl is that it'll show you the results directly
on screen, both of the IVTC and Deinterlace. Simply use the slider to
move around in the movie and check if you see any interlaced frames. Normally
you shouldn't.
If everything has been set the last step before encoding is to load our
audio track. Simply open the WAV file that DVD2AVI created for you by
selecting File - Open audio. If you want to perform a sampling rate conversion
simply choose an audio codec that is designed for 44.1KHz sampling rate
when choosing the codecs later on, that will downsample automatically
- or at least it seems to.. it definitely was 44.1KHz and it sounded rather
good so I presume that it didn't just encode at 44.1KHz which should results
in really bad sound without a conversion.
If you haven't normalized enable the normalize filter which you also find in the settings menu.

The farther to the right you set the slider the louder the overall output volume will be. As usual you enable the filter by checking the checkbox in the top left.
Now let's save the AVI by selecting File - Save AVI. Should you want to encode multipass MPEG-4 using the m4c plugin then it's time to change guide now. When you've already done the scene change detection make sure you select Information From : AviUtl in the keyframe log options in the m4c plugin options and that you set Scene change detection level to 0 since the job has already been done by the scene change detection plugin.
>> Read more about
MULTIPASS ENCODING

I think I don't have to discuss choosing video and audio codecs, do I? Simply choose some suitable settings for the audio codec, set crispness to 100 in the DivX codec and now comes the biggie: When you used the Scene change plugin set keyframes to a ridiculously high value, up to the length of the movie. Since AVIUtl will set keyframes according to what the scene change plugin found out you don't have to worry about a keyframe interval but the keyframes will be set a scene changes in any case. If you didn't use the plugin set a low value.. preferably each second but the lower your bitrate the higher the time difference between keyframes as discussed in the bitrate and resolution guide.
You can also give your movie a title and set a copyright notice which will be displayed in Media Player. I have yet to find where the comment field hides in Media Player. If you check Disable for audio you'll end up with an AVI that has no soundtrack and if you'd check one of the No recompress checkboxes you'd end up with either uncompressed audio and video so make sure all these three checkboxes are unchecked, then save the AVI.
It will take a long time but it'll work, you'll have a great looking movie encoded at the optimal 23.976fps framerate without any interlacing artifacts and the sound will be synch thanks to the IVTC.
